(Heads up: Some of our links in this post are affiliate links. This just means that, at no additional cost to you, we earn a small commission if you click through and make a purchase. This greatly helps us with the costs of upkeep for this site. If you have any questions or concerns about our use of affiliate links, please let us know. All opinions are 100% ours and we would never let an affiliate relationship affect our reviews. Thanks!)
Ichetucknee Springs State Park
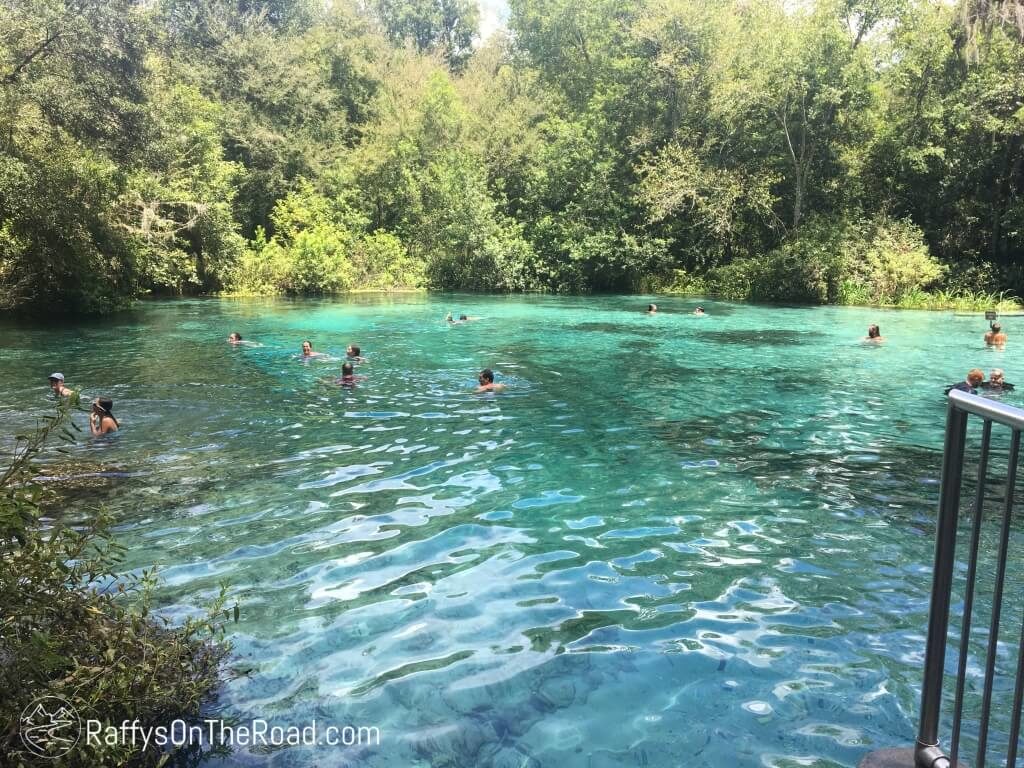
The Ichetucknee River is a pristine, spring-fed river that flows 6 miles from its Head Spring in the Itchetuckee Springs State Park to its terminus in the Santa Fe River. Most of the river runs through the State Park, located in North Central Florida, near the town of Fort White. Known for its crystal clear water and it’s cool (no, make that COLD) year-round 72-degree water, the Ichetucknee is an incredibly popular spot for tubing in the summer months – and for good reason!
The State Park does an amazing job managing thousands of visitors each year, however, knowing their policies and procedures – and some tips and tricks – will make your trip down the Ichetucknee River a relaxing day to remember.
Tube Options
The first thing you need to decide with tubing the Ichetucknee is how you’re going to get your tubes. Options include . . .
A. Bring Your Own Tubes
If you already own tubes suitable for floating down a river, you’re in luck! Just pack your tubes and your air pump (and life jackets for little people), and you’re ready to head to the State Park. Keep in mind that your tubes need to be on the sturdier side, not just a typical pool float (the plastic is too thin and will pop when going over a stick or bumping into a tree – ask me how I know).
When searching the stores or Amazon, you need to look for “river tubes” (not pool floats). Tubes like this or this are pretty standard and affordable.
The first (top picture below) is convenient because the tube has a mesh bottom which makes a nice place to sit and it keeps the river grass from tickling your booty as you float. It also has a headrest which is nice for a relaxing float. The second (bottom picture below) is your standard vinyl tube. We have tubes like the top picture for the adults, and the kiddos all have tubes like the second picture (they like to pop in and out of the tube hole) and they’ve always worked out well for us.


The advantage of having your own tubes is, not only will you avoid spending time arranging for rentals, but in just a few trips down the river, you’ll have made your money back!
Keep in mind that all tubes must be under 5-feet in diameter to safely float down the river. So leave the floating island or party barge at home.
We typically arrive with our tubes deflated and quickly inflate them with this pump that plugs into the van.

B. Rent Tubes Outside the Park
If you don’t own tubes, there are outfitters outside the park to get rentals. Most outfitters offer a variety of tubes including simple old-school tire tubes, regular vinyl tubes, clear vinyl tubes (you can see the river through the tube!), vinyl tubes with mesh bottoms and headrests (like above), double tubes, and small rafts. Prices typically range from $5 to $10 for tubes with an additional charge for the small rafts.
You simply tell the outfitter what tubes you would like to rent and they will usually help load/tie the tubes onto your vehicle for you. Then just figure out which entrance you would like to tube from (see below) and be on your way!
Entering at the North Entrance, we have had good experiences with the Ichetucknee Tube Center (we have no relationship with them, they’ve just always been nice people and we love nice people).
C. Rent Tubes Inside the Park
A recent addition to the tubing options, Ichetucknee Springs State Park now offers tube rental inside the park! Whether you want to tube from the North or South Entrance, you park at the South Entrance, rent your tubes and either enter the river from one of the South Entrance launches (Midpoint Launch or Dampier’s Landing) or take the tram ($7.50+tax per person) up to the North Entrance launch.
While this is a super convenient new option, if you have a large family (like us), paying a tram fee for each member (plus the admission fee to the State Park and the tube rental fees) becomes cost prohibitive if you want to tube from the North Entrance.
River Options
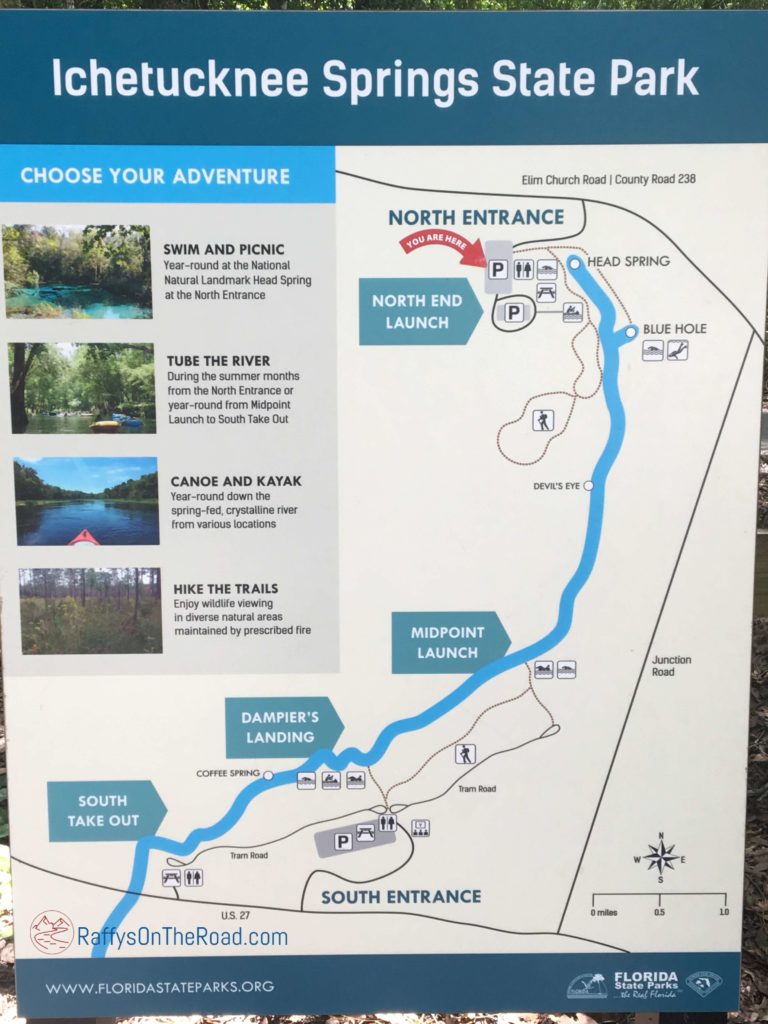
After renting your tubes, the next decision to make is how long you want to be on the river. The Ichetucknee runs from north to south through the Ichetucknee Springs State Park. So the longest float trip begins at the North Entrance (and ends at the South Entrance Take Out). There are shorter options available by exiting the river before the South Entrance or starting at one of the South Entrance landings.
Keep in mind that the North Entrance is only available for tubing from Memorial Day to Labor Day. Between Labor Day and Memorial Day you can only tube from the South Entrance landings.
A. North Entrance
To get the most of your day on the Ichetucknee River, start at the North Entrance and float all the way down to the South Take Out for a relaxing float with beautiful scenery over 3.5 hours (covering 3.5 miles of river). While this is the longest and most ecologically diverse float, it takes some maneuvering to make it happen because you cannot park your vehicle for the day at the North Entrance.
Keep in mind, the State Park only allows 750 tubers to put in at the North Entrance and these spots fill up surprisingly fast on the weekends. To have a good chance of being able to float from the North Entrance, I highly recommend going on a weekday when the crowds are smaller. But if you must go on a weekend, plan to get there EARLY (and understand it will be busy).
If you are bringing your own tubes – either from home or an outside vendor – you will need to first bring your entire party to the North Entrance of the State Park.
Once you’ve arrived at the North Entrance, the driver will leave the passengers and the tubes at the North Entrance and proceed to the South Entrance 7 miles away (see map below). The driver will then park the vehicle at the larger South Entrance Parking Lot. The driver then purchases himself/herself a shuttle band ($7.50+ tax in 2018 – includes tram as well) at the Concession Stand and takes the shuttle back to the passengers and tubes at the North Entrance.
While at the South Entrance Concession Stand, the driver can also purchase the other passengers tram bands ($5.50+tax in 2018) if the group wants to ride the tram from the South Take Out back to the South Entrance Parking Lot. If the group doesn’t want to purchase tram bands, other options include walking the approx. .55 mile trail from the South Take Out to the South Entrance Parking Lot, or exiting the river earlier at Dampier’s Landing and walking the 1/4 mile trail back to the parking lot.
While the driver is heading to the South Entrance to park the vehicle and ride the tram back, the other passengers are left to explore the North Entrance! There is a great trail to Blue Hole where you can swim or scuba dive, or you can stay closer to the parking lot and enjoy swimming at the Head Spring. There are also restrooms and picnic tables available. The trip for the driver down to the South Entrance and back isn’t always the quickest, so make the most of your time waiting and enjoy the gorgeous North Entrance area!
If you are renting tubes inside the State Park – instead of going to the North Entrance, proceed to the South Entrance, park the vehicle, and go to the Concession Stand area to rent your tubes from the on-site outfitter. Each member of your party will then need to purchase a shuttle band ($7.50+tax in 2018) and ride the shuttle up to the North Entrance.
Once everyone in your party is at the North Entrance (either dropped off by the driver or via shuttle), the group is free to finally get in the water! Simply walk a short trail from the parking lot to the launch, throw the tubes in the water, and try to plop yourself into the tube while not getting soaked because the water is COLD (but you’ll get used to it quickly).
At that point, you just sit and relax and let the current take you down the river!
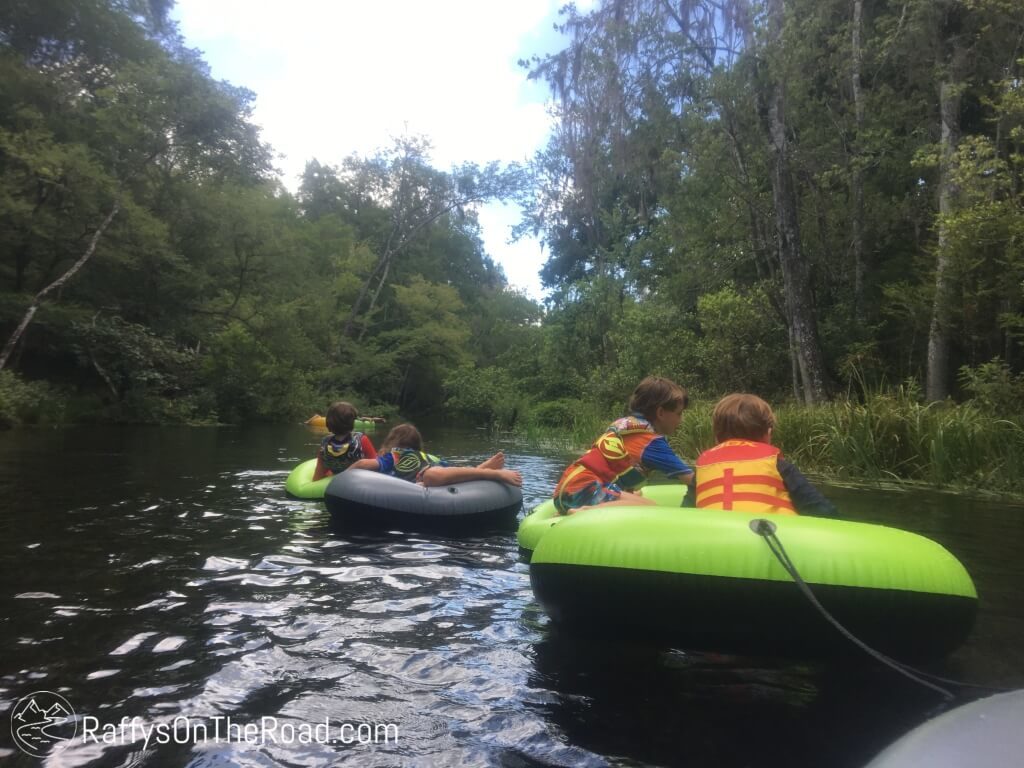
The first part of the river is fairly narrow . . .
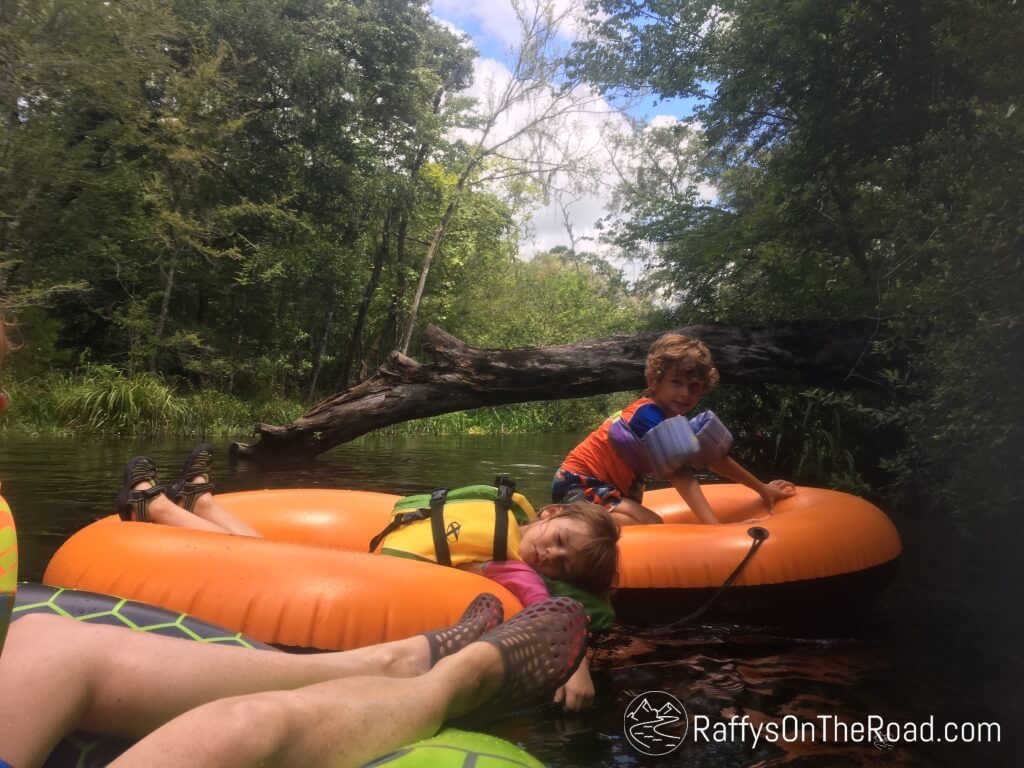
An example of why tubes need to be under 5-feet in diameter . . . You have to duck under this tree or go around – neither of which would be possible in a large vessel.
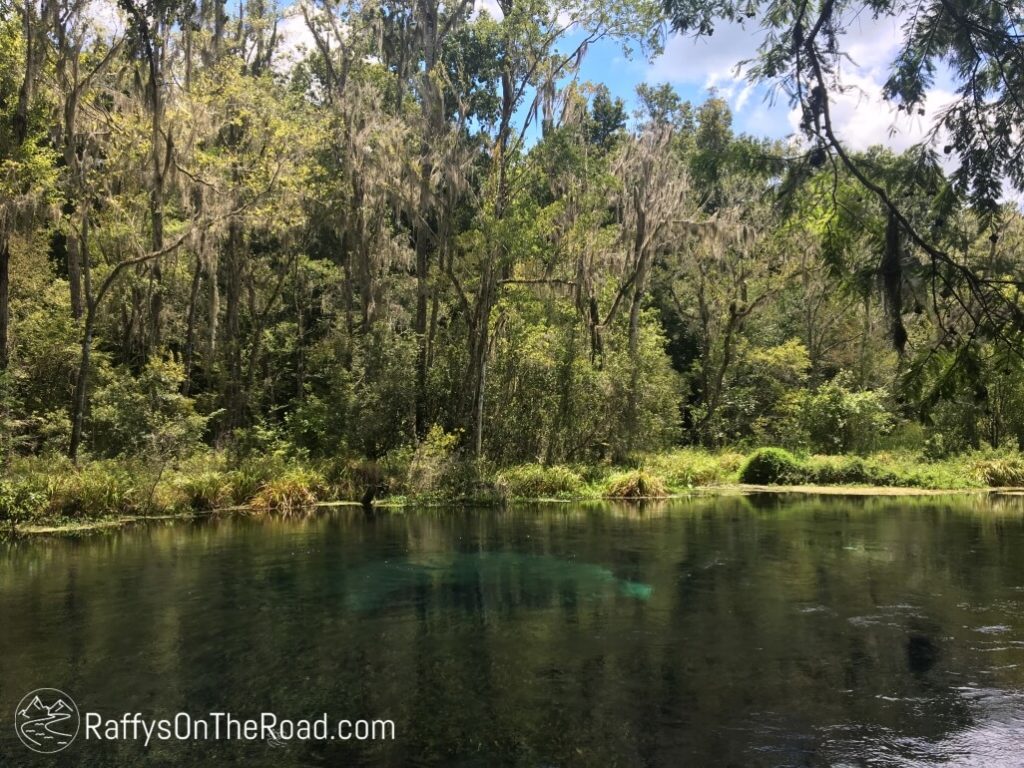
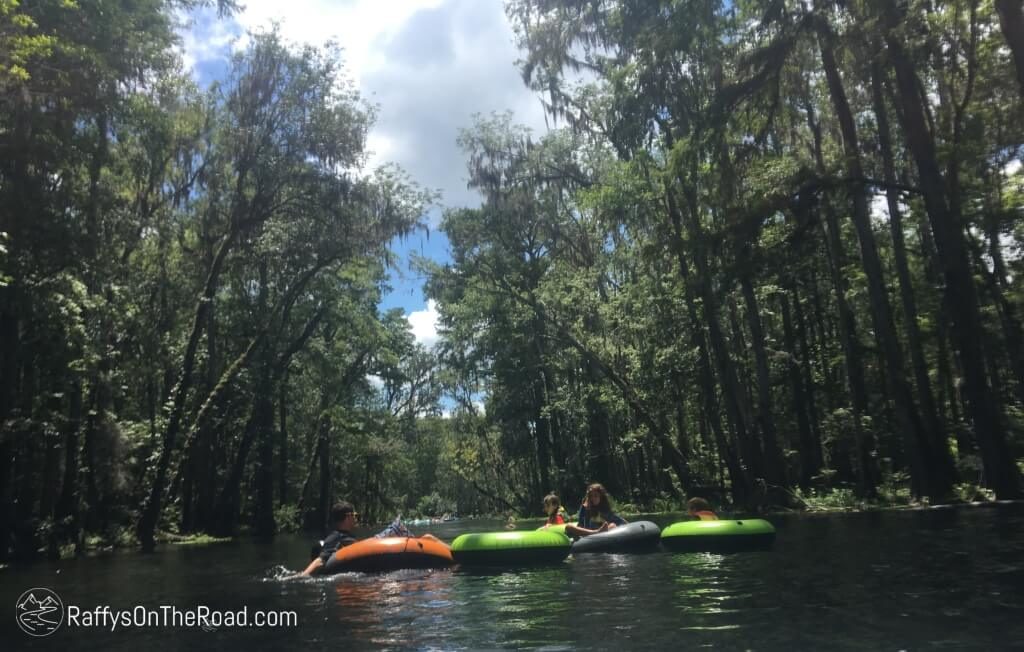
But it quickly opens up into a wider river with marshy banks full of flowers and wildlife . . .
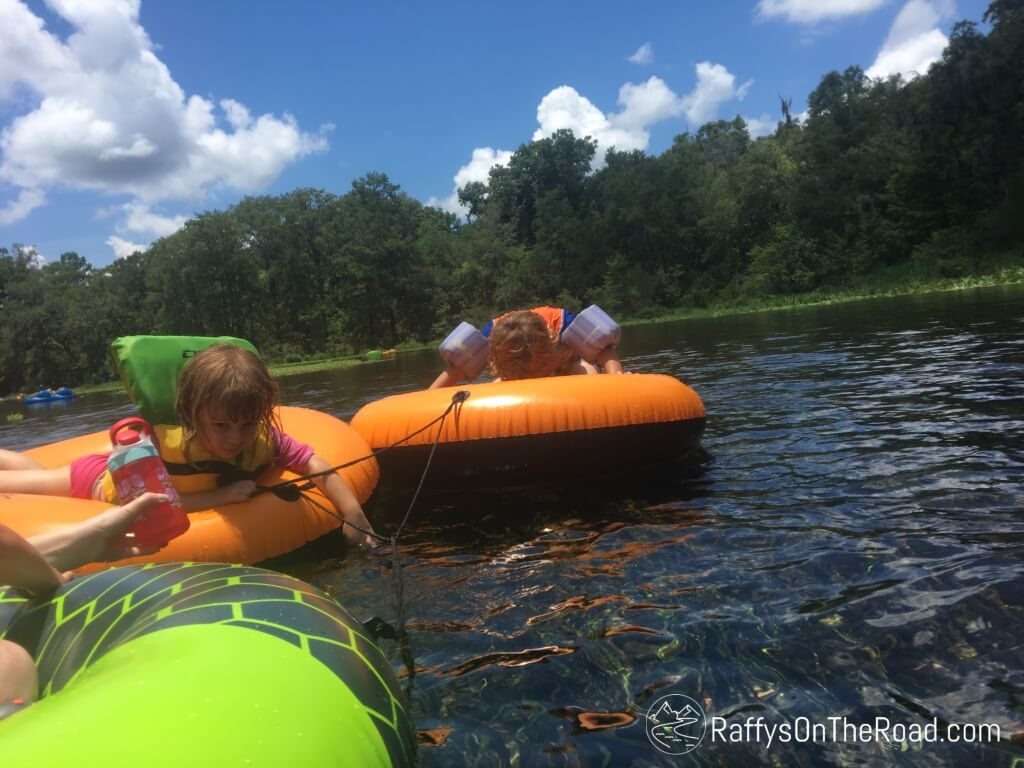
Make sure you have sunscreen because this portion of the river can have intense Florida sun in the summer!
Once you pass the Midpoint Launch the river narrows again with increasing shade of the gorgeous cypress trees . . .
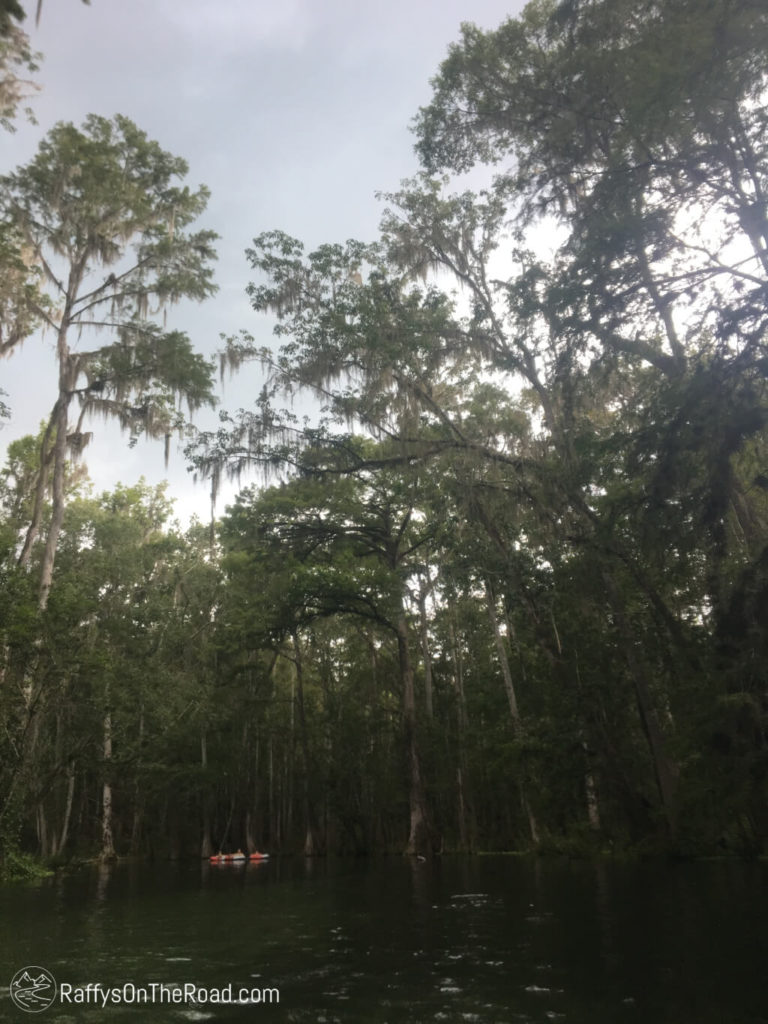
While most everyone would suggest you take the river all the way down to the South Take Out, if for some reason you would like to get off the river earlier, you can exit at Dampier’s Landing and walk 1/4 mile back to the South Parking Lot. You will pass Midpoint Landing on your float down the river, but the State Park does not use that landing as a take-out spot (it is only for launching tubes).
Once you reach the South Take Out, if you have rented tubes (either from an outside outfitter or the on-site vendor), you will place your tubes in the area designated for your rental company. If you brought your own tubes, we generally deflate the tubes once off the river to make them easier to carry.
For those who have previously purchased either a shuttle band or a tram band from the South Entrance Concession Stand, you meet the tram at the South Take Out and it will transport you back to the South Entrance Parking Lot. If you didn’t purchase the bands, it’s an approx. .55 mile trail you can take to walk back to the South Entrance Parking Lot. While not scenic, and sometimes tiring after a long day on the river, it saves you $5.50+tax per person, so you make the call. 🙂
B. South Entrance
If you don’t get to the park early enough to make the North Entrance cut-off or if you’re just looking for a shorter float on the river, head on over to the South Entrance. As this is the parking lot you will be floating back to, it makes the trip a little less complicated than the shuttle use from the North Entrance.
From the South Entrance, you have two float options.
1. Midpoint Launch
For a relaxing 1 3/4 hour float down the river, you can launch your tubes at Midpoint Launch and float down to the South Take Out. To get to the Midpoint Launch you can:
(1) ride the tram ($5.50+tax per person) to the launch with your tubes,
(2) hike the Midpoint Trail to the Midpoint Launch. The Midpoint Trail is approx. .65 miles and generally a flat walk through a dirt and small rock path.
(3) walk the tram road to the Midpoint Launch. If for some reason you don’t want to take the wooded Midpoint Trail, you can get to Midpoint Launch by following the road the tram takes, for an approx. 3/4 mile walk.
Once you are on the river, simply float on down to the South Take Out. If you’d previously purchased your tram bands, you’ll just leave your rented tubes at the take-out (there are separate areas for each company) or take your own tubes, and ride the tram back to the South Entrance Parking Lot.
This portion of the river is reasonably shaded, with lots of opportunities to see wildlife like turtles, fish, and birds. We even saw an otter swimming along the shore on this section of the river!
If you decided not to purchase tram bands, there is an approx. .55 mile trail alongside the tram road that leads back to the South Entrance Parking Lot. It’s an easy trail, not particularly scenic, but gets you to where you’re going (for free).
If you put in at Midpoint Launch and for some reason need/want to get off the river before the South Take Out, you can exit at Dampier’s Landing and walk a 1/4 mile trail back to the South Entrance Parking Lot. The park does not allow exiting the river at Midpoint Launch (though I’m not sure how they would enforce that). Floating time from Midpoint Launch to Dampier’s Landing is approximately 45 minutes to an hour.
Be aware that the State Park caps the number of tubers entering at Midpoint Launch to 2250. Yes, that seems like a ton of people, but it can and does fill up on summer weekends (have I mentioned this is a popular park in the summer?). In that case, your only remaining option is to put in at Dampier’s Landing, which isn’t a bad option but makes for a much shorter trip (but you can always go down twice which we’ve done before when we’re not yet ready to be off the river).
2. Dampier’s Landing
If it’s late in the day and you missed the cut-offs for the North Entrance and Midpoint Launch or you just want to do a shorter float to see how the kids do on their first time, you can launch at Dampier’s Landing for a still-relaxing, but shorter 45-minute float to the South Take Out.
To get to Dampier’s Landing you just walk your tubes down a 1/4 mile trail from the South Entrance Parking Lot to the landing. Your only take out option at this point is the South Take Out.
Once you exit at the South Take Out you leave your rented tubes in the area designated for your rental company, or simply take your own tubes back with you. If you purchased a tram band at the South Entrance Parking Lot Concession, you’ll hop on the tram and it will take you back to the South Entrance Parking Lot. If you didn’t purchase a tram band, there is a dirt trail, approx. .55 miles, that leads back to the South Entrance Parking Lot.
12 Tips to Keep in Mind
1. The North Entrance is only open for tubing from Memorial Day to Labor Day.
While you can paddle the river from the North Entrance year-round, the river is closed to tubers from Labor Day to Memorial Day to give the shallow and ecologically sensitive northern section time to regrow and recover from the busy summer season.
2. No food, drinks, pets, fishing, tobacco, alcohol, or disposable items are allowed on the river.
There are rangers stationed at all entrances to the river (trust me) there to check any coolers, bags, or belongings. This river is gorgeous and wonderfully pristine and we all want to keep it that way so leave Fido at home, save your drinking for later, and have a picnic lunch waiting in the cooler in your car for when you get off the river (or eat at the Concession Stand at the South Entrance).
You are allowed a reusable water bottle – and I highly suggest bringing one. Even though you’re surrounded by cool, clear water, it’s still Florida and you’ll be hot, sweaty, and thirsty on the river. I also recommend bringing something (rope, clip, etc.) to attach your water bottle to your tube so if you tip over, your water bottle doesn’t end up downstream.
3. Bring water shoes.
Even if you take the shuttle and/or tram service, there will still be some walking down to launch areas and from the take-out areas. These areas can be rocky and/or slippery so I highly suggest water shoes (not flip-flops unless you want to watch them float downriver).
4. Have a water-proof plan for your keys and cell phone.
If you bring it on the river, it will almost certainly get wet. Even if you don’t go swimming on purpose, there is always that chance of tipping over, getting splashed, or being bumped and having your belongings tip overboard. Two things you don’t want wet or on the bottom of the river – your keys and your cell phone (I’d recommend not bringing it but you’ll need something to take pictures of the gorgeous scenery).
For our cell phones, we use these water-proof pouches and have never had a problem with them. You can even take photos or videos underwater using the pouch. I like the long string attached – you can either wear your phone around your neck or tie it to your tube.

For keys, you can either use the same water-proof pouch you use for the cell phone or use something like this or this.
No matter what you do, you need to make sure these things stay dry and are in something that won’t sink to the bottom of the river (either because the container floats or it’s tied to something that floats).
5. Life jackets are a must for little ones.
The river has a current – without it you wouldn’t be floating down the river. And the current is such that it’s difficult to swim against for all but the strongest of swimmers. Unless your kiddo is older or a very strong swimmer, I suggest keeping them in life jackets. You can rent life jackets from most tube outfitters (for around $2) or bring your own. These are the ones we use: babes (infant-20 pounds), puddle jumpers (20-50 pounds), child life jacket (30-50 pounds), youth life jacket (50-90 pounds).
I’ve taken my kiddos down this river as young as 5 weeks old (not that I can recommend that), and I’ve never felt like they were in danger, but I’ve always made sure they had life jackets on. It allows them a little more freedom to swim around without you having to worry about them getting away from the tubes and tiring out trying to swim upstream – or you not being able to get upstream to them if for some reason you’re separated.
6. Want to stay in a group? Tie the tubes together.
The great thing about tubing is you don’t have to paddle and you just relax and float. The not so great thing about tubing is you don’t have much control over where your tube is going, as you’re just floating along. Which is great except if you have kids you want to keep nearby and instead they keep floating away.
What we generally do is bring short pieces of rope (or use the rope the outfitters use to tie the rental tubes to the car) to tie the tubes together. Plus it makes it more fun to float down in a group.
7. Bring goggles and snorkels!
If you have them, bring your goggles and snorkels! With the crystal clear water, it is so fun to look underwater and check out the entire ecosystem going on under the water! There are tons of turtles and fish to watch as you float by.
8. No expensive sunglasses, jewelry, or anything else you don’t want to lose.
If you don’t want to lose it, don’t bring it on the river. I can’t tell you how many friends have lost expensive sunglasses on the river. Things happen, you try to rearrange yourself and all of a sudden, your tube is upside down and you’re underneath – along with everything you were holding – including your glasses, cell phone, and keys if you haven’t tied them onto you or your tube.
9. No tubes over 5 feet.
This used to not be a thing until the invention of the party barge or floating island. They’re fun on a lake but they won’t fit on the narrower sections of the Ichetucknee. Make sure your tubes and rafts are under 5 feet in diameter.
10. It’s Florida – have sunscreen.
No matter what time of year it is (we’ve tubed all the way into November before), or how cloudy it is, it’s still Florida and you’ll need sunscreen. The northern portion of the river especially has several parts without any shade where you’re just floating along peacefully under the hot sun. Don’t end your relaxing trip with a sunburn.
11. Paddling the Ichetucknee.
You can kayak, canoe, or SUP from the North Canoe Launch or Dampier’s Landing (located at the South Entrance) year-round. Paddling Adventures is the on-site outfitter for the Ichetucknee River and offers canoe, kayak, double kayak, and SUP rental3. s which include transportation. They also offer transportation for private boats and passengers for a fee.
With that in mind, I would never try to paddle from the North during a summer weekend. It’s entirely too congested and a pain to paddle around all the tubers. Go on a weekday or off-season for a peaceful trip down a more secluded river.
12. There is no camping at Ichetucknee Springs State Park
I get asked this all the time, but no, Ichetucknee Springs State Park does not offer camping. However, there are several private campgrounds in the area as well as O’Leno and Gilchrist State Parks nearby.
Have you been tubing at Ichetucknee Springs State Park? Any tips or tricks you would add to this list?
Pin This: